
In this blog post, I am explaining an easy method to add a new column to a data set which contains Automatically updating Serial Numbers.
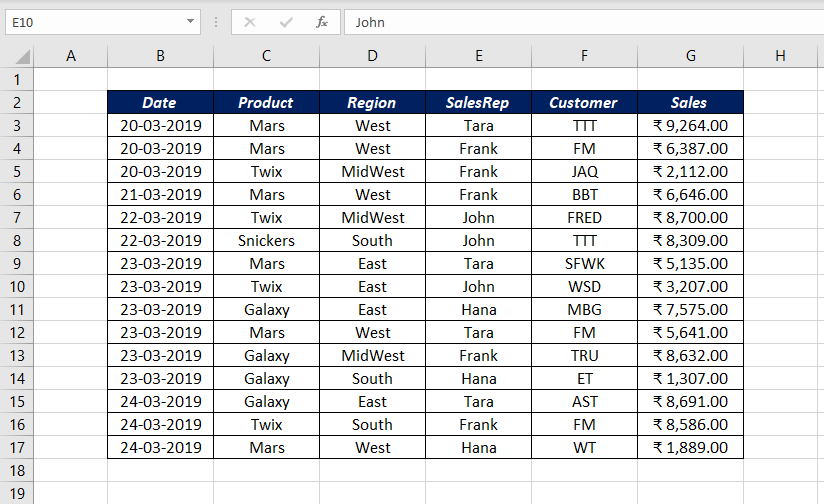
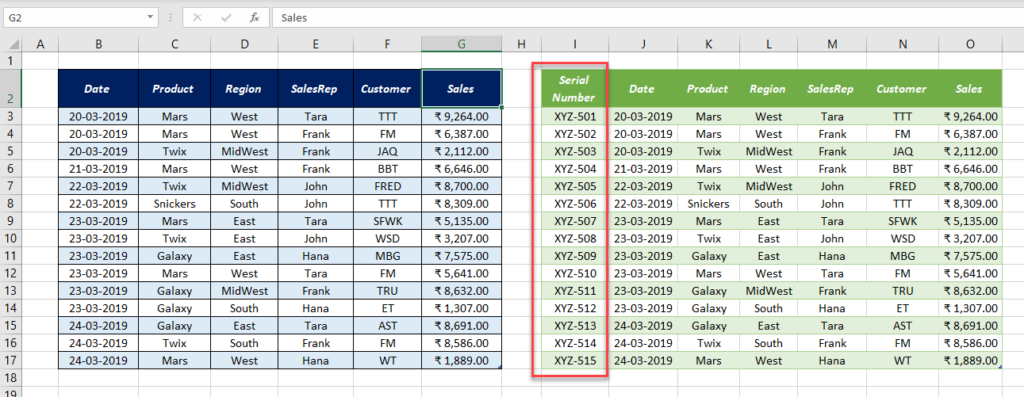
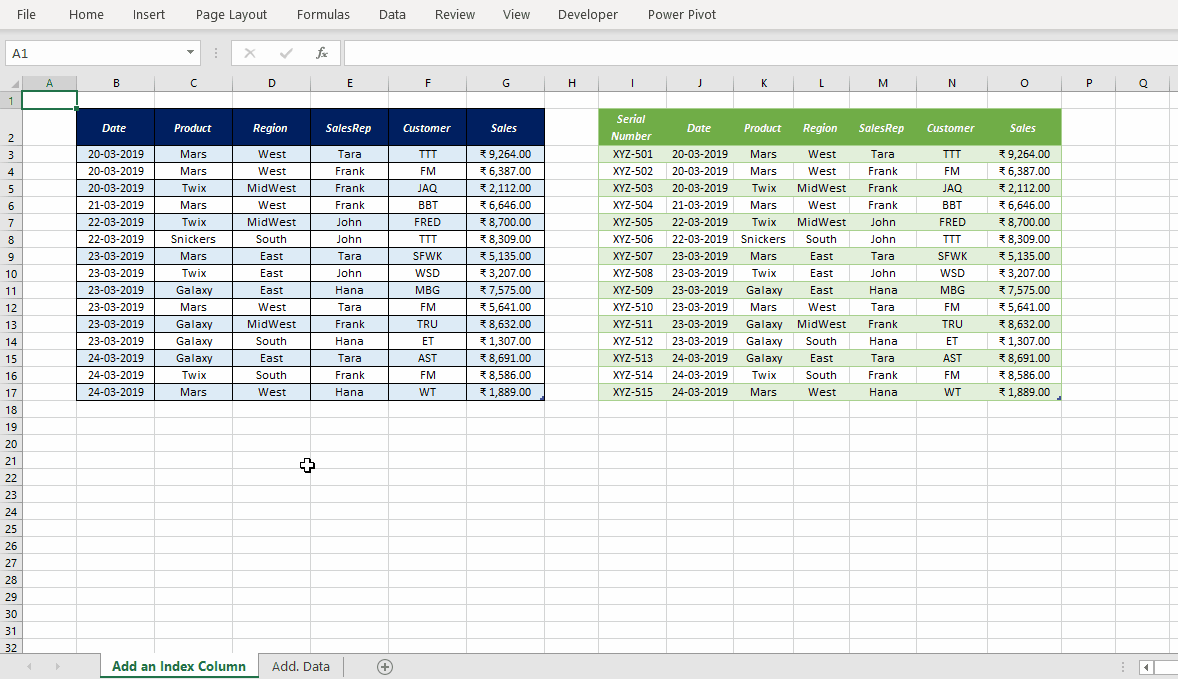
Following is the data set to which I want to add a new column of Serial Numbers.
To add a column of Automatically Updating Serial Numbers to this data,
Select a cell in the data set > go to the Data tab in Excel ribbon > From Table/Range > Click OK in the Create Table dialog
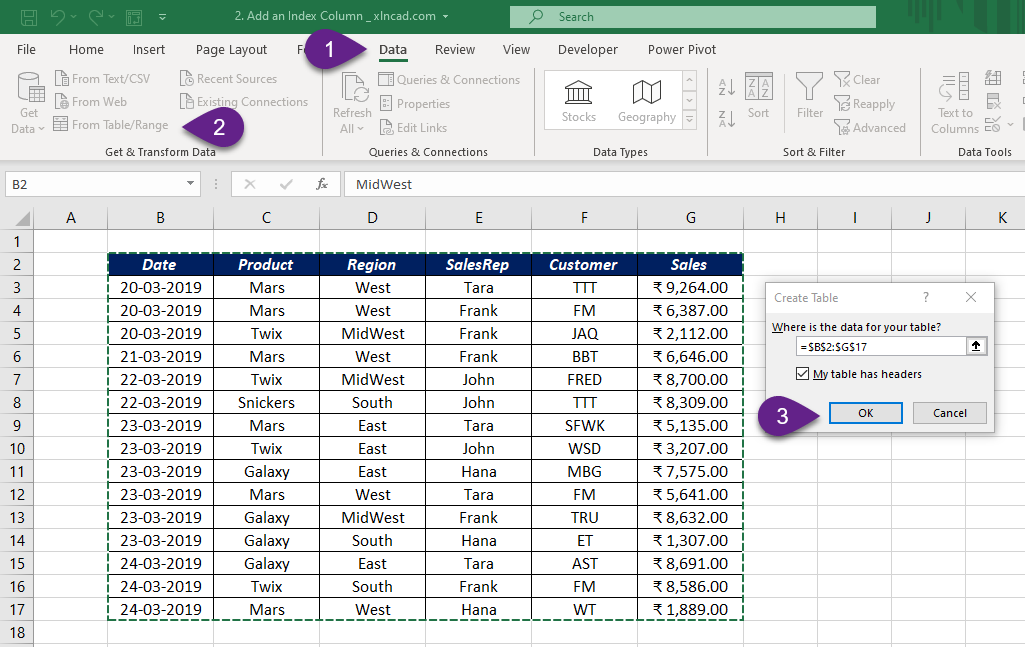
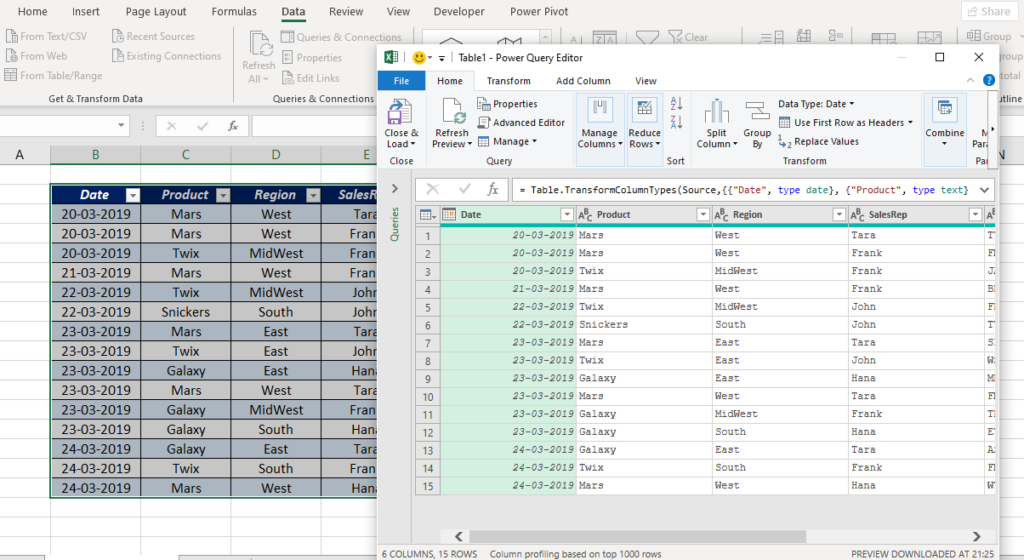
Selected data is loaded into the Power Query Editor of Excel
To add an Index Column,
go to the Add Column tab of the Power Query Editor > click on the split button for Index Column and we will get 3 options called ‘From 0’, ‘From 1’ & ‘Custom…’
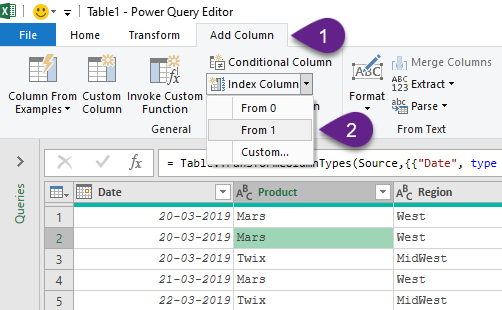
The option From 0 will create a column called Index with serial numbers starting from 0. Similarly, the option From 1 will create a column called Index with serial numbers starting from 1.
For the serial number to start with any other number like 50, 75 or 501, we need to select Custom.
When you click on Custom and the dialog called Add Index Column will be activated. In the input box under the label Starting Index, type in the Serial Number from which you want to start with.
Also specify the difference between the Serial numbers, in the input box for Increment.
Here I have used the number 501 as the Starting Index and 1 as increment.
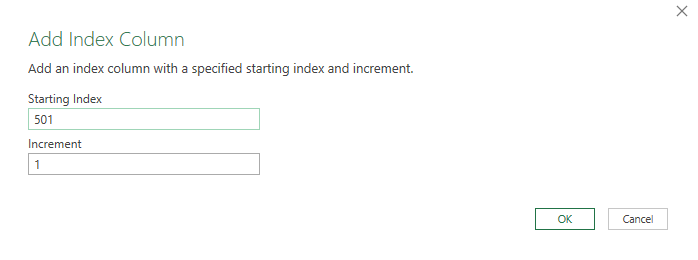
Note that you can even use negative numbers as increment.
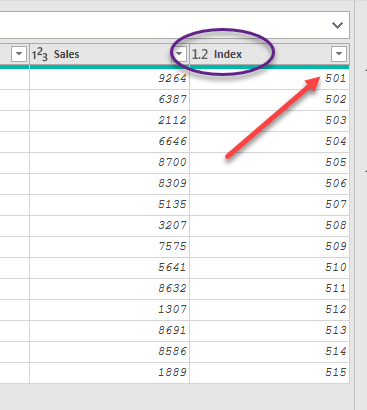
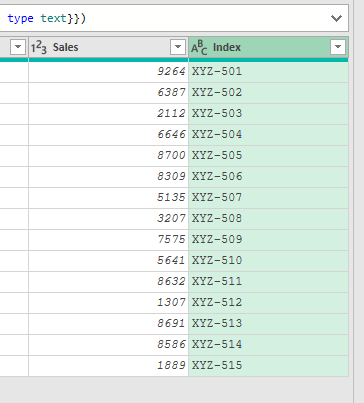
A new column called Index is created with Serial Numbers starting from 501.
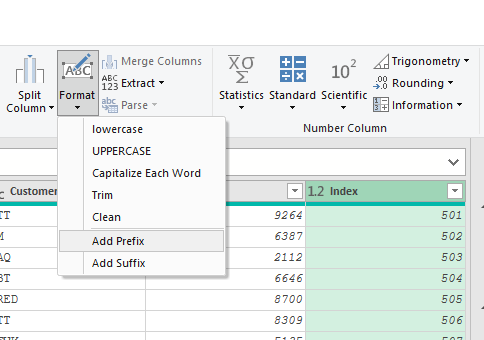
Now if you want to Add a Prefix or Suffix like ABC or XYZ to the serial numbers,
Select the column containing serial numbers (Index in this case) > In the Transform tab > Click on Format > Select Add Prefix or Add Suffix
I have selected Add Prefix and got the following dialog box called Prefix and I have used XYZ- as prefix for the serial numbers.
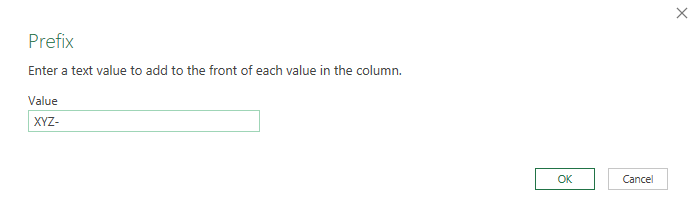
When I click OK, I have ‘XYZ-‘ added before every serial number in the column called Index.
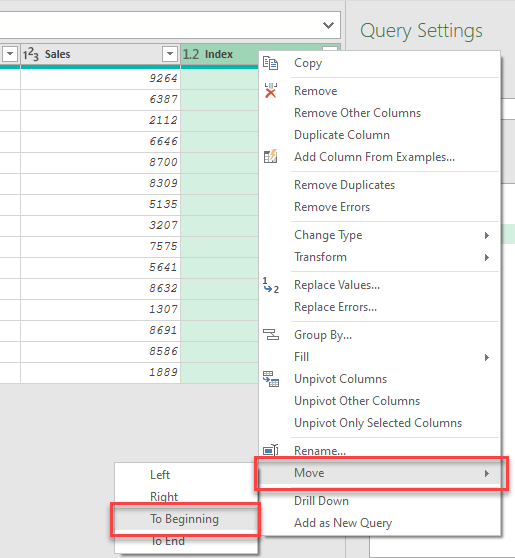
To move this column to the beginning of the data set i.e. to make this column the first column of the data set,
Right-click on the column header > Move > To Beginning
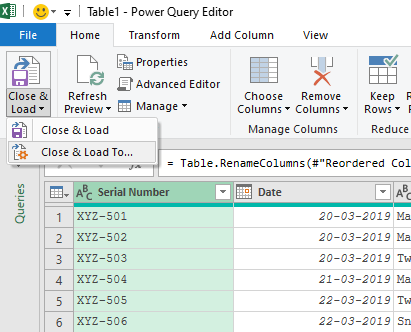
If you want to rename the column header, double-click on it and type in the new name. Here I have changed the column name from Index to Serial Number.
To load this data into the Excel sheet, Click on the Split button for Close & Load in the Home tab > Close & Load To…
In the Import Data dialog > Select Existing worksheet > Select the cell where you want to place the data (Here, I have selected the cell I2) and Click OK
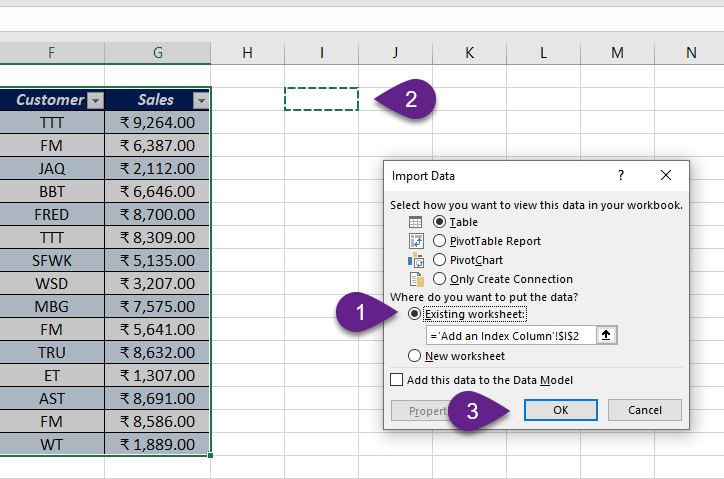
Now, the table which we created using Power Query has a new column for Serial Numbers starting from 501.
Whenever you add new data to the Source Table or make some changes to this table, you don’t need to repeat these steps again.
Just right-click on the output table and select Refresh.
Check my video on How to Auto Number Rows in Excel