In this blog post, I will walk you through the Top 25 Tips & Tricks in Microsoft Word.
Table of Contents
1. Insert Date and Time
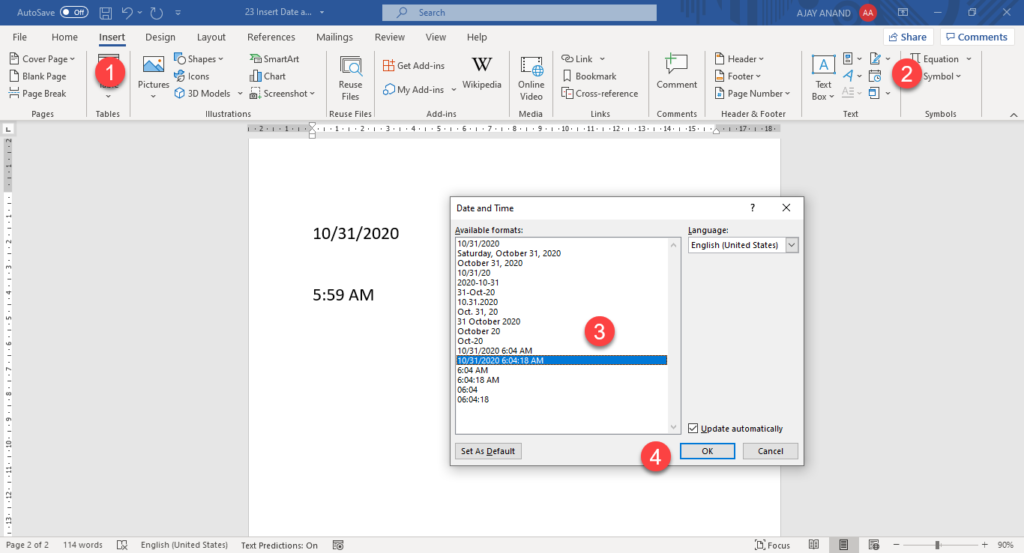
Alt + Shift + D is the shortcut for inserting Current Date into a word document.
Similarly, Current Time can be inserted into a document using the shortcut, Alt + Shift + T.
Note that these fields are all dynamic, So, when I open this document on a later date, these fields for Date and Time will update automatically.
You can also insert the Current Date and Time using the Insert Date and Time option in the Insert tab of the Excel Ribbon.
2. Insert Serial Numbers
Following is how we can add Automatically updating Serial Numbers to the column of a Table
Select the cells of the column where you want to insert the serial numbers > in the Home tab > Numbering > Select 1,2,3 from the Numbering Library.
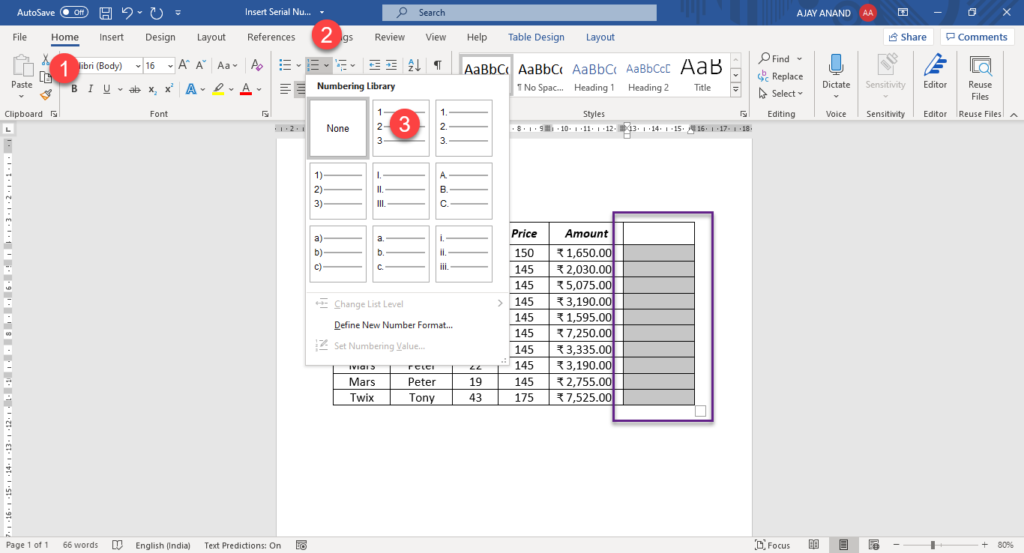
These serial numbers are dynamic and will update whenever we add or delete Rows.
3. Change Letter Cases
Shift + F3 is the keyboard shortcut to toggle through Upper, Lower and Sentence Cases in MS Word.
4. Insert Table
To insert a Table, go to the Insert tab of the Excel Ribbon > Table > select the cell corresponding to the Rows and Columns required in the Table. If you want 4 columns and 5 Rows, select the cell in the 4th column of 5th Row.
Another method to create Table is using + (plus) and – (minus) signs.
Type in +—-+—-+—–+ and press the Enter key to create a table with 3 columns.
The number of – (minus) signs in between the + (plus) signs determine the width of the columns.
5. Insert Separator
To insert a single line separator between two paragraphs, type in the – (hyphen) 3 times and press the Enter key.
=== (equal sign) for double line
### (pound sign) for triple line
*** (Asterisk) for dotted line
6. Sort Text, Number & Dates
To the sort a list of names in their reverse Alphabetical order > select the data > in the Home tab > click on Sort > select Descending and click OK
7. Uses of Ctrl Key
Press Ctrl + Right arrow to jump to the next word, Ctrl + Left arrow to jump to the previous word.
Ctrl + Shift +Right arrow to add one word at a time to the selection, Ctrl + Backspace to delete a word each.
Ctrl + Down arrow and Ctrl + Up arrow to jump to next and previous paragraphs respectively.
Ctrl + End and Ctrl + Home to jump to beginning and end of the document respectively.

8. Convert Number to Words
To convert a number into equivalent words, Select the number and press Ctrl + F9. A pair of curly brackets ‘{}‘ will be added around the number.
Type in = (equal) before the number and \*cardtext after the number. Right-click on the number and select Update Field and the number will be converted to words.
Note that this option will work for numbers up to 9,99,9999.
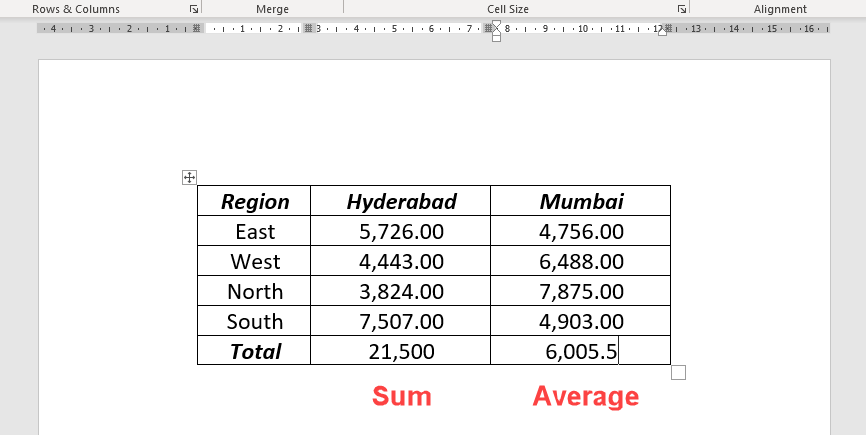
9. Find the SUM of Values in Tables
To find the Sum or other aggregations for a column in a table, select the bottom-most cell in that column > go to the Layout tab > click on Formula
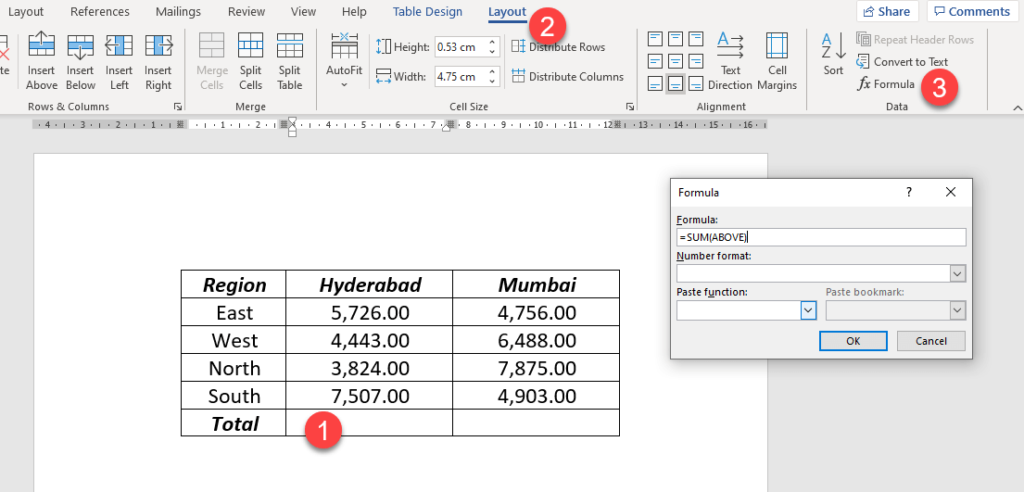
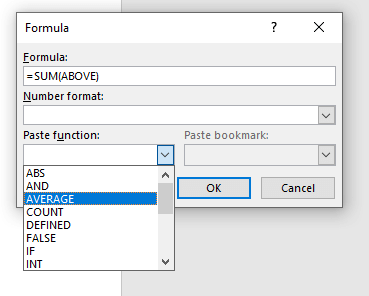
The dialog called Formula is activated and assuming that we are looking for the sum, Word is suggesting the formula =SUM(ABOVE). But if you want to change the aggregation use the drop down menu under the label Paste function and choose the corresponding function.
Once you have selected the required function, click OK to confirm it and we will have the aggregation in the selected cell.
10. Format Painter
Double-Click on the Format Painter to apply a particular formatting to multiple portions of a document.
Once you are finished with applying formatting, press the Esc key to get out of this mode.
11. AutoCorrect
Frequently used words or sentences can be assigned to short keys using the AutoCorrect option in Word.
For example, I need to assign a shortcut to the sentence ‘Greetings from XL n CAD’.
Select the sentence > go to the File tab > Options > select Proofing from the left side bar > AutoCorrect Options… The selected sentence will be displayed in the AutoCorrect dialog.
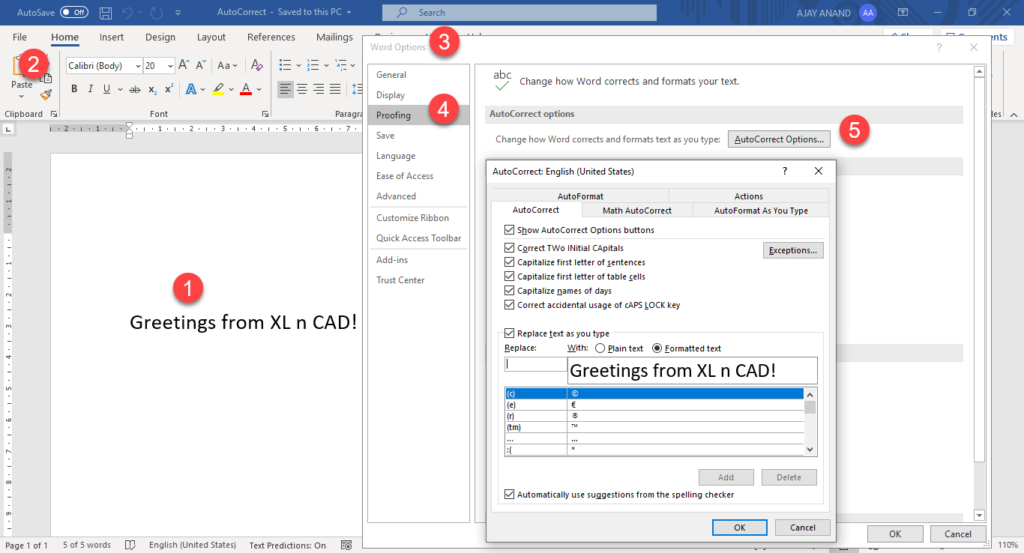
In the input box called Replace, type in the character combination (shortcut) which will be replaced by the selected sentence. Here I have used the characters ‘$Gr’. Click OK to confirm.

Now when I type in ‘$Gr‘ and press the Enter key or Space bar, the characters will be replaced by the sentence ‘Greetings from XL n CAD’.
12. Insert Hyperlink
Folders, files, websites and email addresses, etc., can be linked to a word or words of a document using the Hyperlink option in Word.
Ctrl + K is the shortcut for Hyperlink.
To link a folder or file to a word or sentence, select the word/sentence and press Ctrl + K. The dialog called Insert Hyperlink will be activated. Using this dialog, select the file/folder to link.
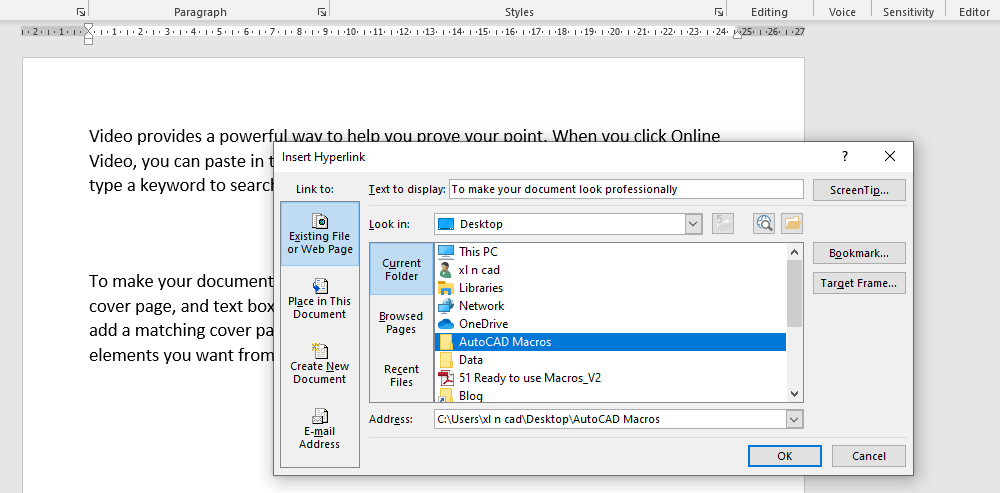
To open the linked file or folder, holding the Ctrl key, click on the hyperlink.
13. Set Default Font
When you install Word for the first time, Calibri will be the default font. Means, whenever you open a new word document, the default font will be Calibri.
To change this default font setting, in the Home tab, click on the Arrow at the bottom right corner of the group called Font.
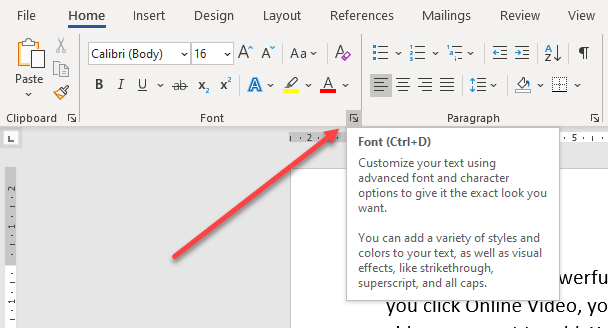
The dialog called Font will be activated and using this dialog we can define a new Font setting.
In this case I have selected Times New Roman for Font, Italic for Font style, 20 for Font size and Blue for Font color. To make this setting default for all documents > Click on Set As Default
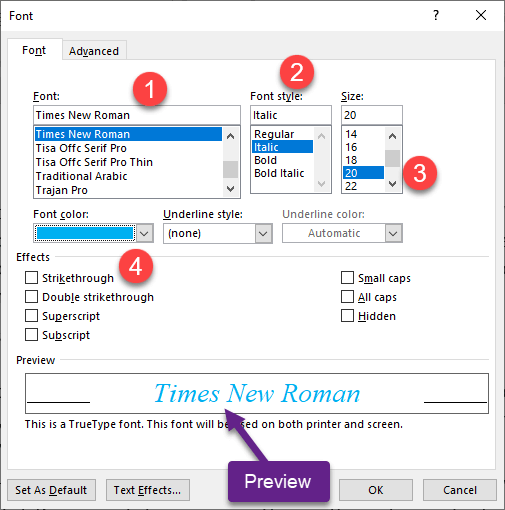
Select the second option, ‘All documents based on the Normal template?‘ and Click OK.
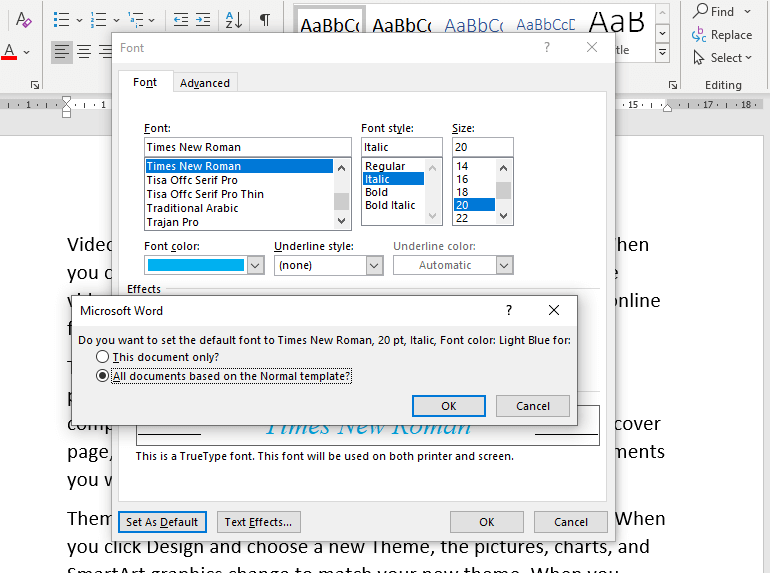
The next time when I open a new Word document, the default font setting will be Times New Roman, 20 pt, Italic, Font color: Light Blue
14. Double-click and Triple-click
To select a word, Double Click on it.
To select a paragraph, Triple Click anywhere in that paragraph.
15. Convert Text to Table
To convert text data that is separated by a specific delimiter (comma, tab, etc.,) into a Table, select the data > go to the Insert tab > Table > Convert Text to Table…
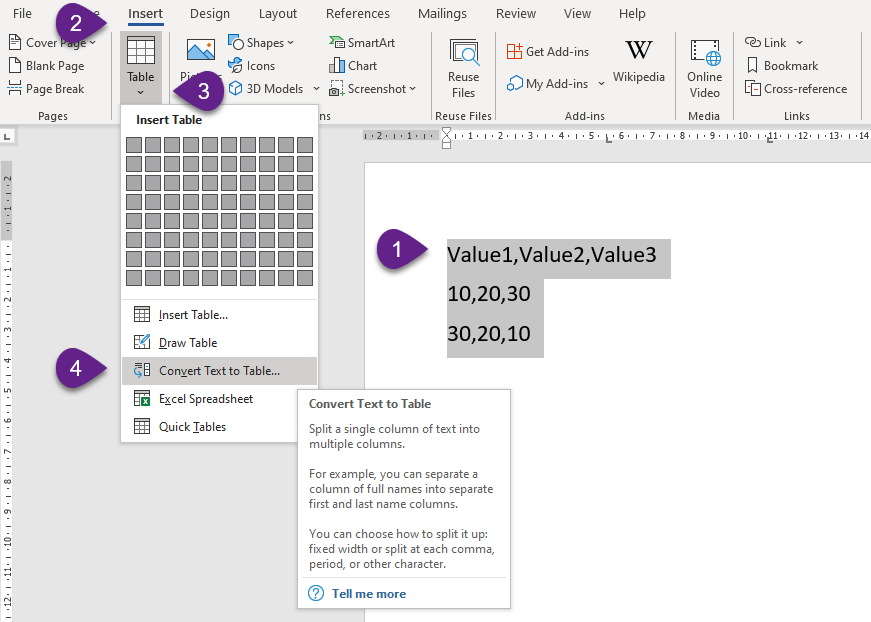
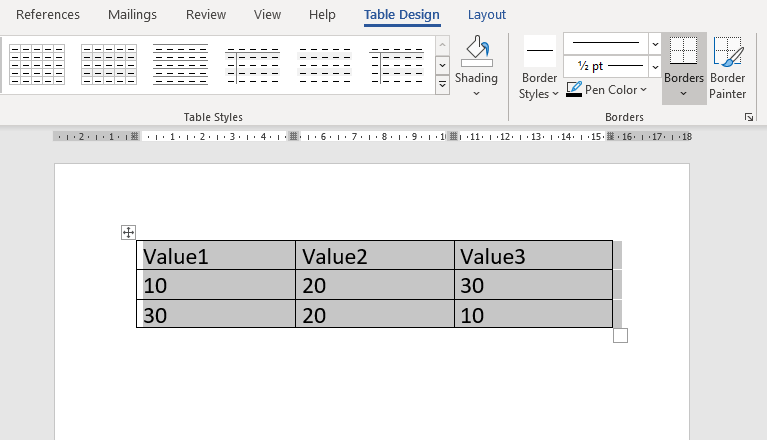
Word will automatically detect the delimiter and will suggest the number of Columns and Rows. Modify the number of columns if you want to and click OK

The selected data is converted into a Table.
Here is a bonus Trick!
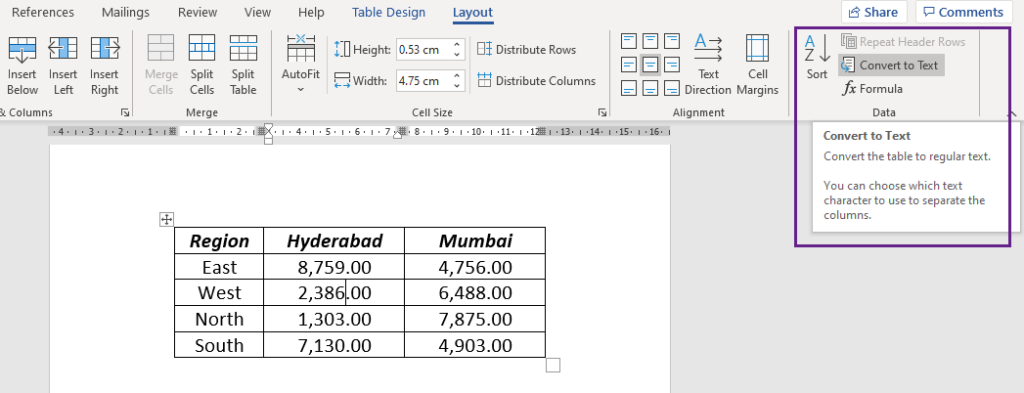
To convert data in a Table to normal text, Select the table > Layout > Convert to Text
Select the delimiter of your choice. Here I have selected Tabs.
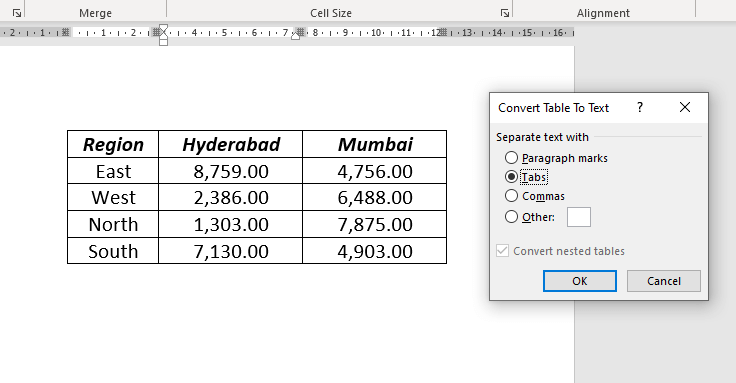
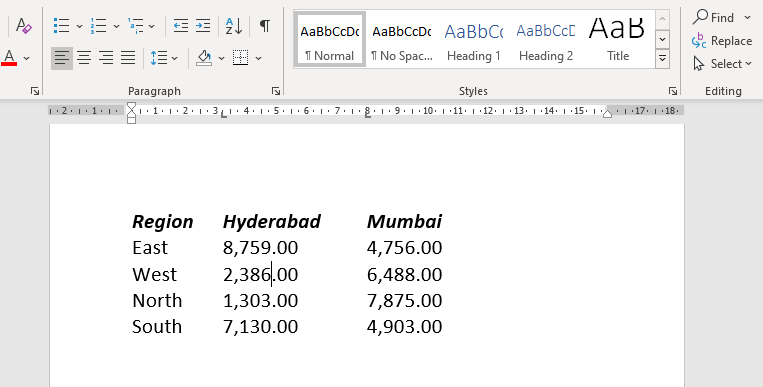
The table is converted into normal text separated by commas.
16. Convert to PDF
To save a word document as a PDF file,
go to the File tab > Save As > click on Browse > using the Save As dialog, select the location where you want to save the file > select PDF from the options for Save as type and click on Save.
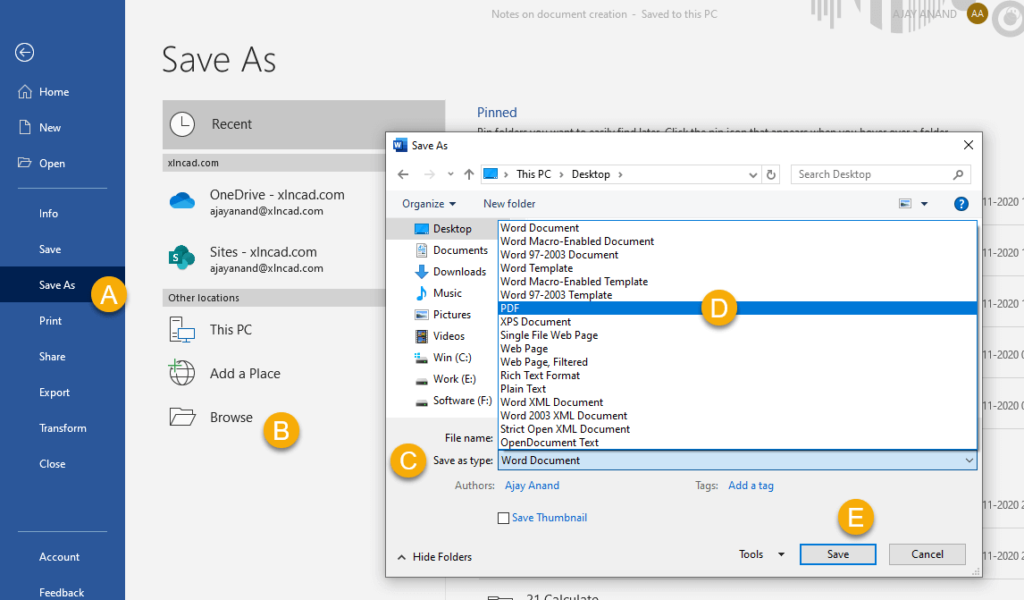
The current document will be saved as a PDF file at the specified location.
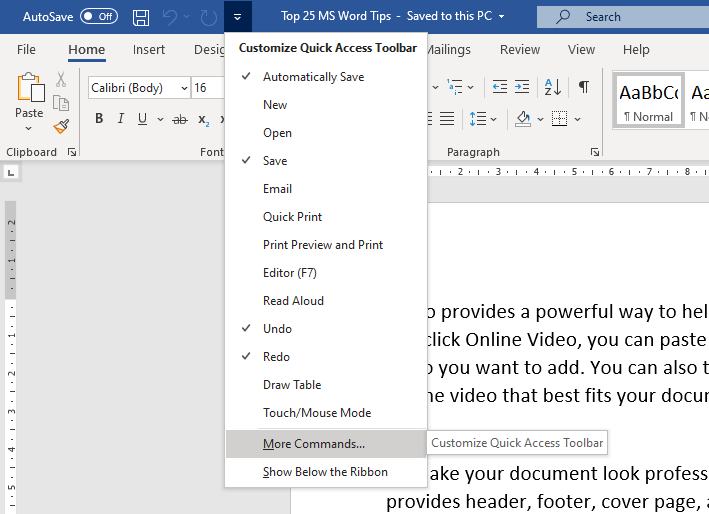
17. Insert File Path
To insert the File path into the document, click on Customize Quick Access Toolbar > More commands…
In the dialog for Word Options > select All Commands > select Insert File Path from the list of commands > Add > OK
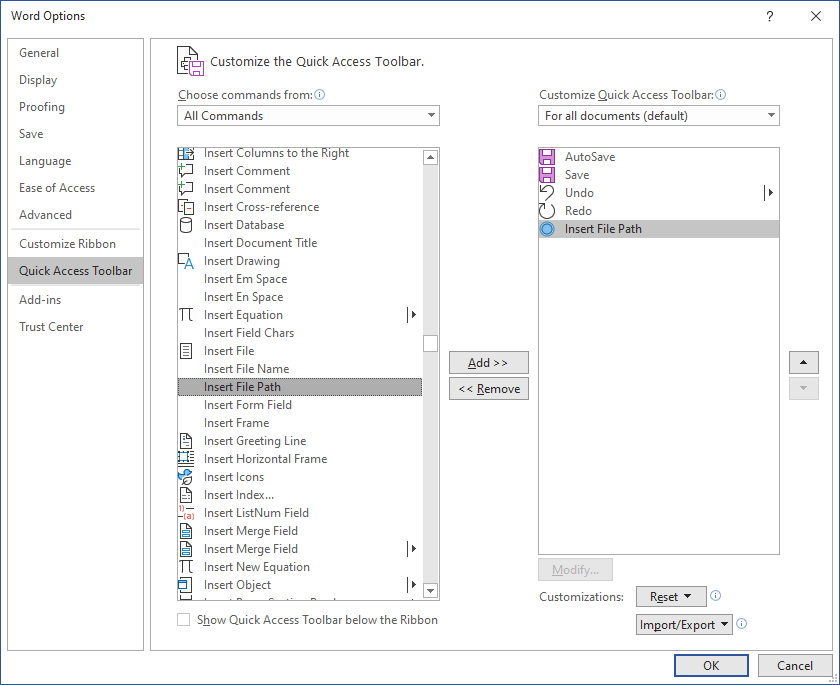
A new button called Insert File Path will be added to the Quick Access Toolbar.
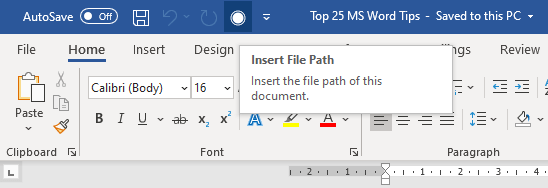
Click on Insert File Path to insert the file path along with the name of the document.

18. Create Random Text
To create random text in a word document, type in the following formula and press the Enter Key
=rand()

5 paragraphs with 3 sentences are created.
If you want to specify the number of paragraphs and sentences, for example, to create 4 paragraphs with 2 sentences each, use the following formula.
=rand(4,2)
For random text in Latin language use the function, lorem()
=lorem(5,3)
19. Insert Screenshot
The Screenshot option in Word enables us to quickly insert the screenshot of active windows into a document.
Go to the Insert tab and click on Screenshot to see the preview of active windows. Click on the corresponding preview to insert the screenshot of it.
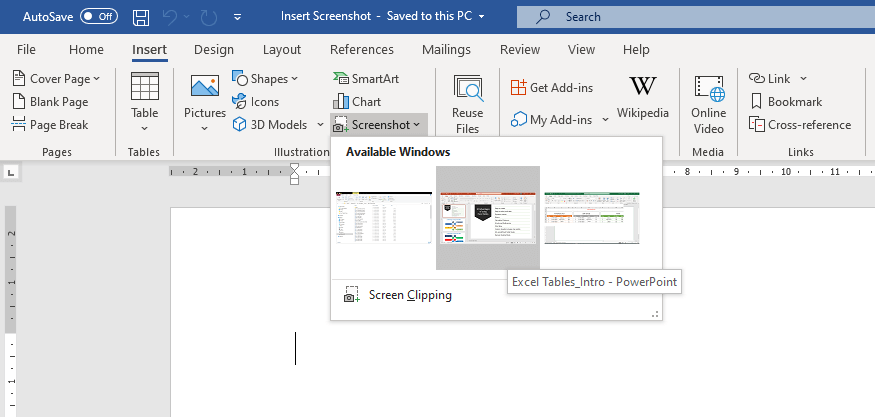
To extract a particular portion from an active window, use the Screen Clipping option.
20. Clipboard Multi Paste
The Office Clipboard makes it easier to Copy Paste, Text and Graphics in office applications like Word, Excel and PowerPoint. Using this clipboard, we can conveniently paste the copied items multiple times.
To access this Clipboard, click on the arrow at the bottom right corner of the group called Clipboard in the Home tab.

Text or Graphics which we copy from documents will be automatically added to the Office Clipboard.
To paste a particular item into a position, click on it.
Use the Paste All options to paste all items in a single go.
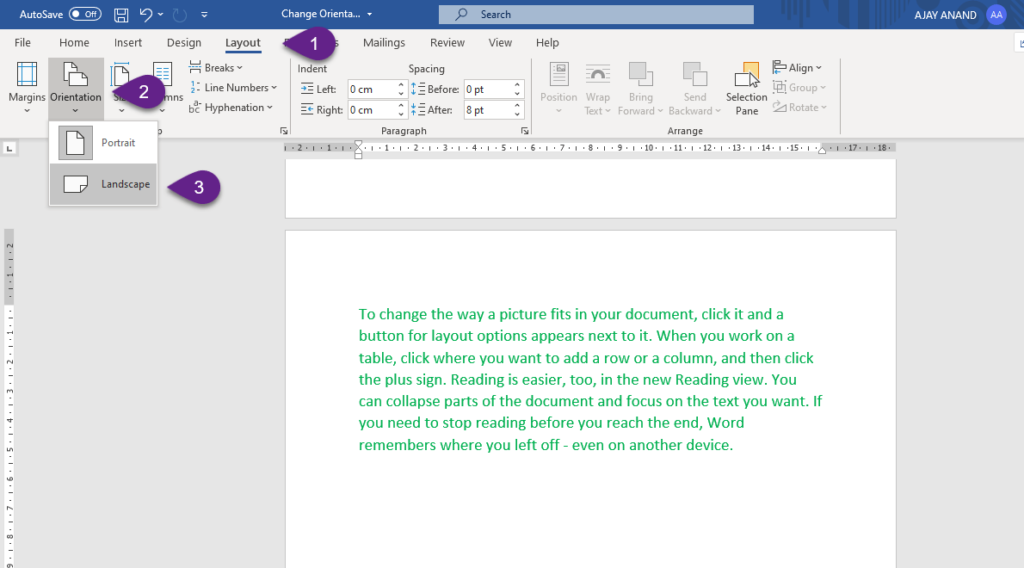
21. Change Orientation
Let me show you how to change the orientation of an individual page in a word document.
Right now the following document is in Portrait mode.
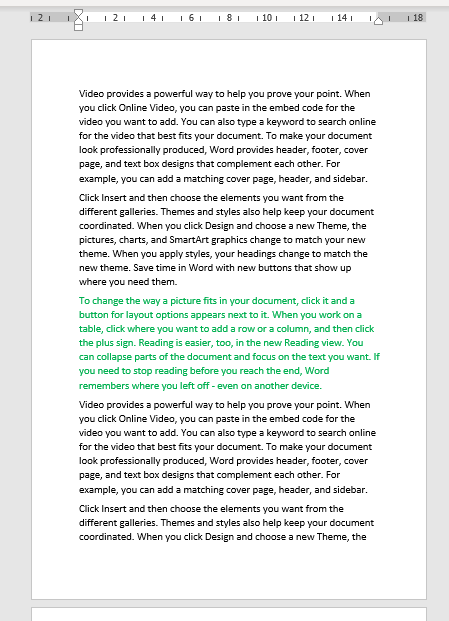
To move the highlighted paragraph (in green color) into a page arranged in Landscape mode
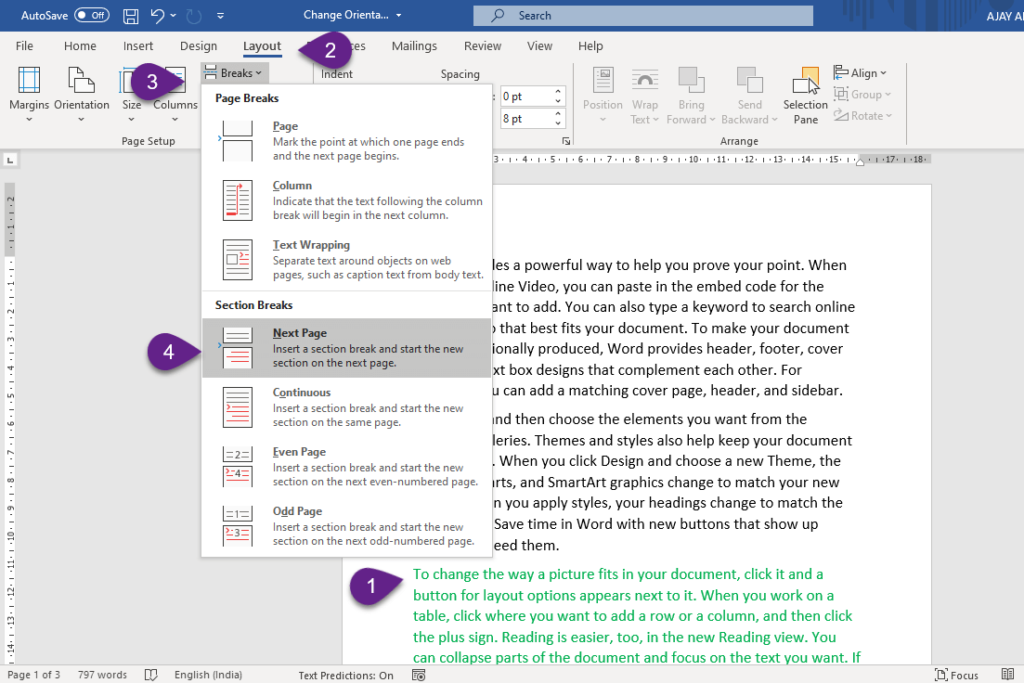
Click on the beginning of the paragraph. Go to the Layout tab > Breaks > Next Page
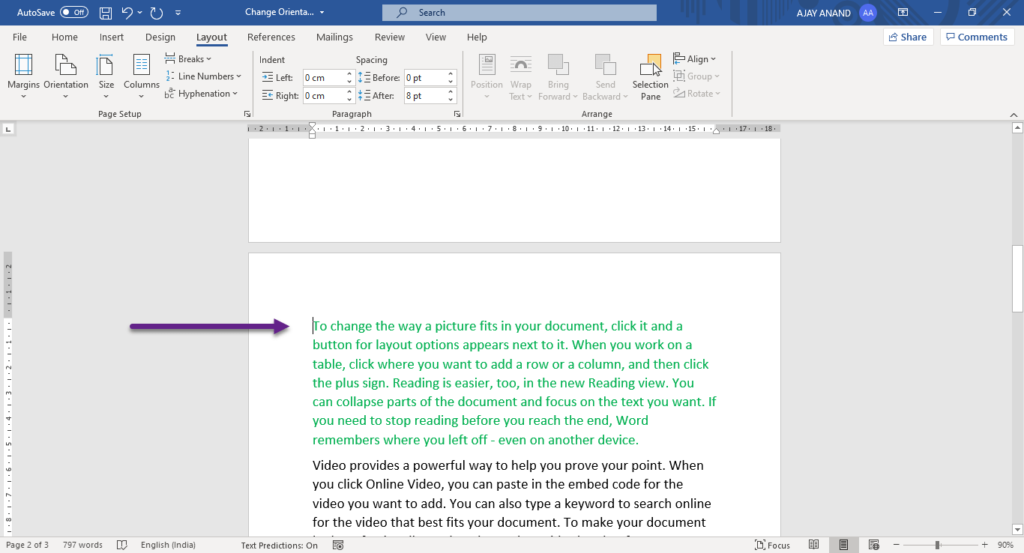
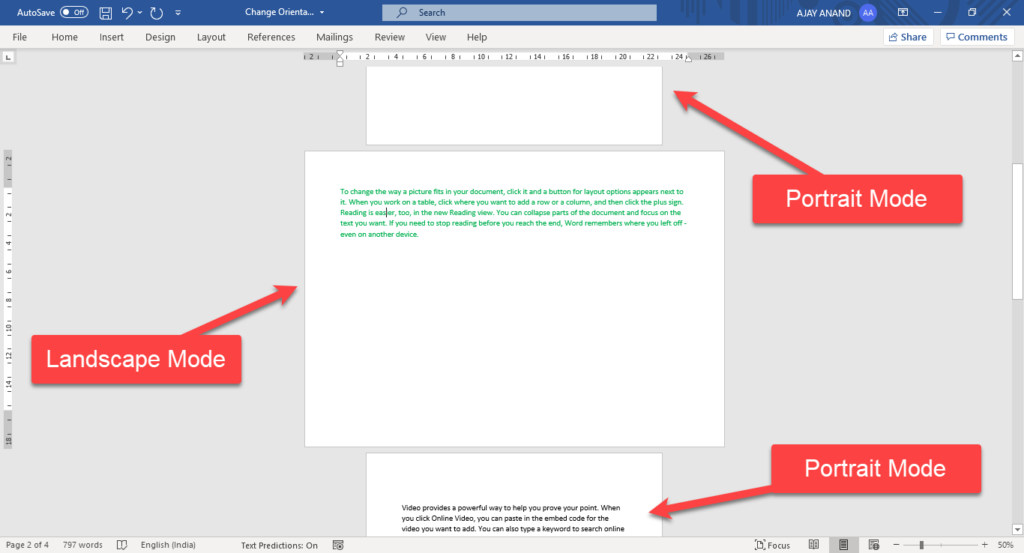
See, the rest of the document moved into the next page.
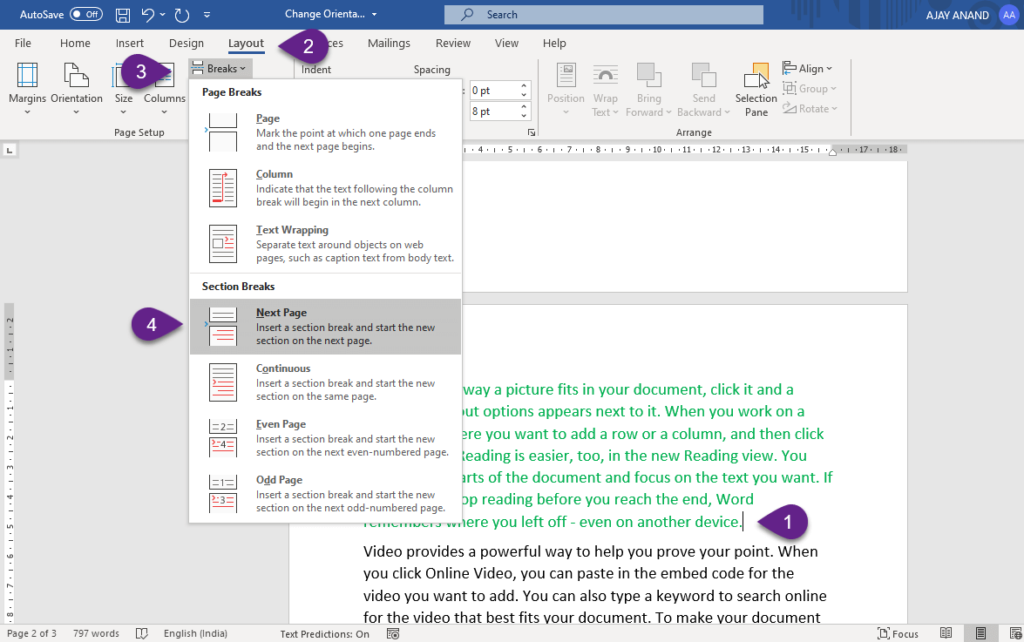
Click at the end of the paragraph. Go to Layout tab > Breaks > Next Page
Now that we have the required paragraph in a single page, click anywhere in the page, go to the Layout tab > click on Orientation > select Landscape
Only the selected page containing the highlighted paragraph is in a page arranged in Landscape mode.
22. Calculate
Word has a Calculate option which can be used to find the result of Arithmetic expressions.
To activate this Calculate option, click on Customize Quick Access Toolbar > More commands…
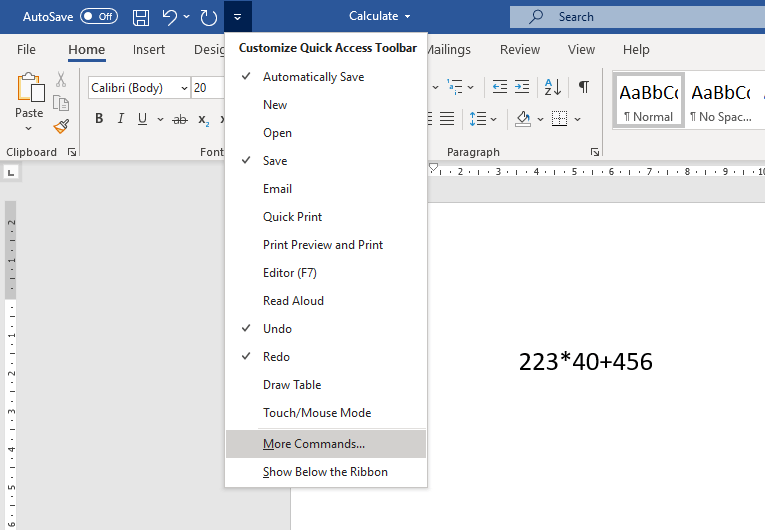
In the dialog called Word Options > select All Commands > select Calculate from the list of commands > Add > OK

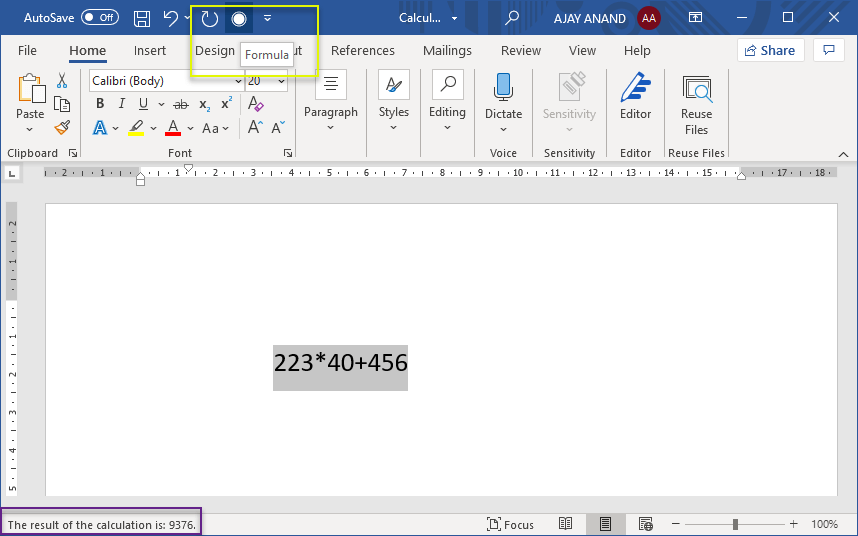
A new button called Formula will be added to the Quick Access Toolbar. Select the expression and click on Formula to see the result of the expression at the bottom left corner of the Word window.
23. Insert equation
Word provides different options to create Mathematical equations of our choice.
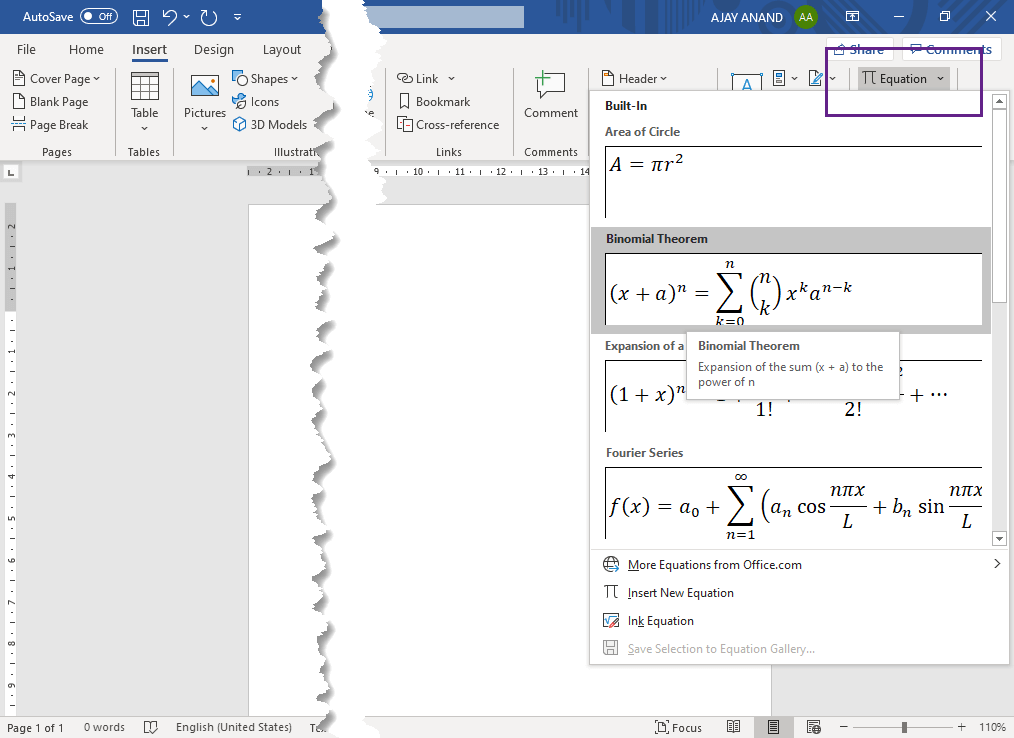
To insert an Equation, go to the Insert tab > Equation
Some of the commonly used equations will be listed here. Equation for Area of circle, Binomial Theorem, etc., Select an Equation to insert it into the document.
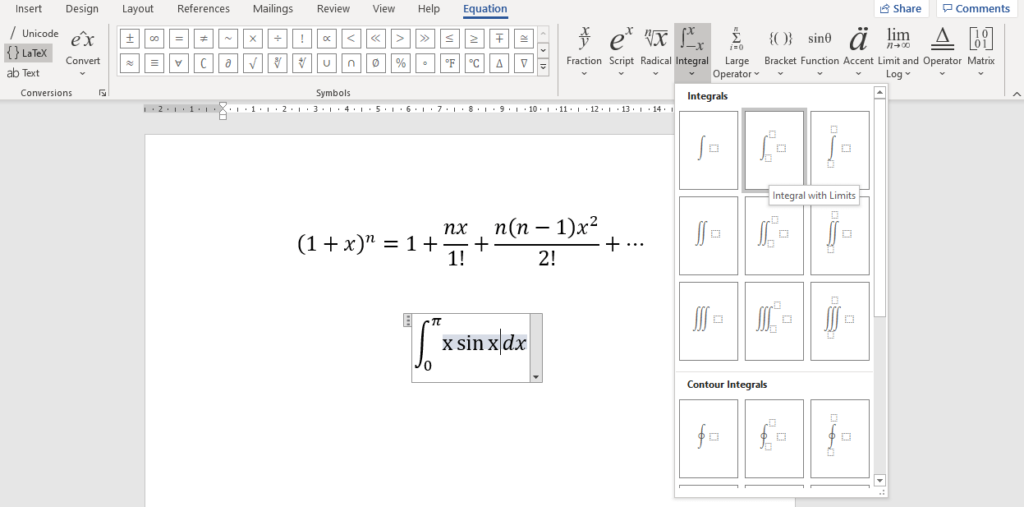
To create a new Equation, in the Insert tab > Equation > select Insert New Equation
A new Equation box will be added to the word document. The Structures, Symbols, Conversions and other Tools in the Equation tab can be used to create the equation of our choice.
24. Add password
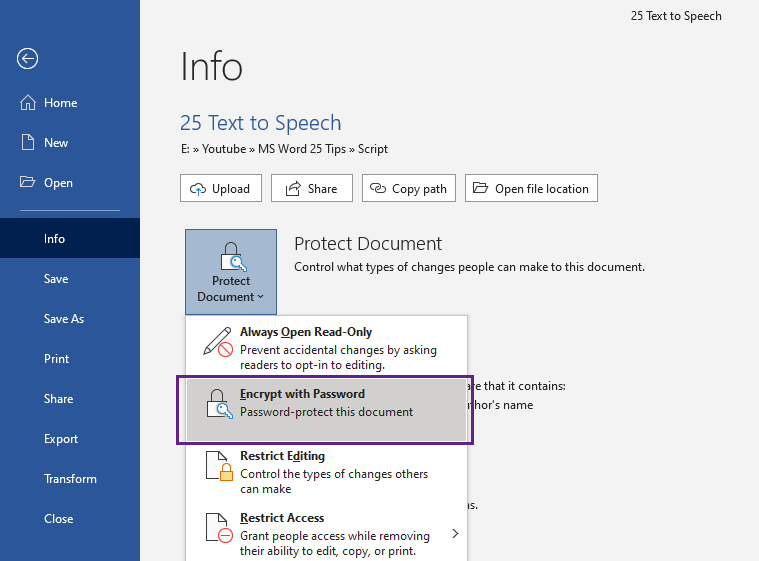
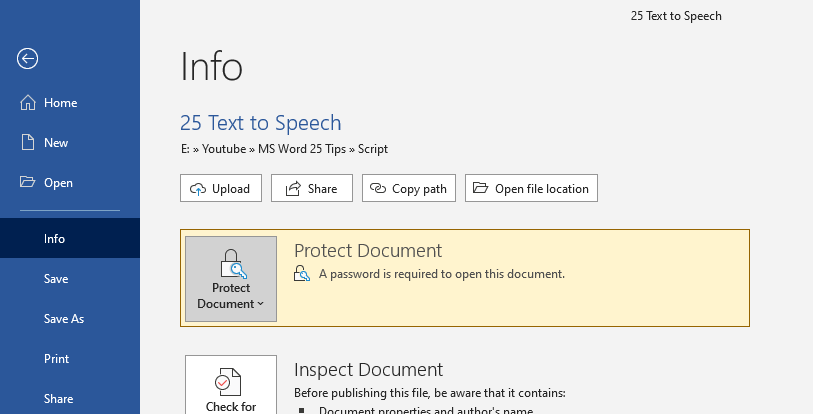
To protect a word document with a password, go to the File tab > Info > Protect Document > Encrypt with Password
Type in the password and click OK.
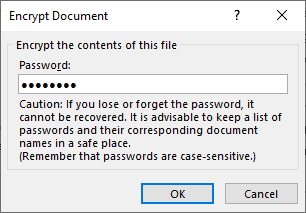
Once again type in the password and click OK to confirm it.
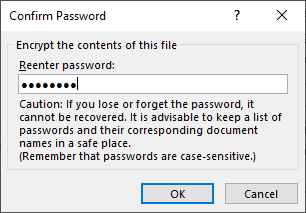
The protect document option displays a new message, ‘A password is required to open this document.‘
Save and Close the document. The next time when you try to open the document you will need to enter the correct password to access the document.

To remove the password, Go to the File tab > Info > Protect Document > Encrypt with Password > delete the existing password > click OK and Save the document.
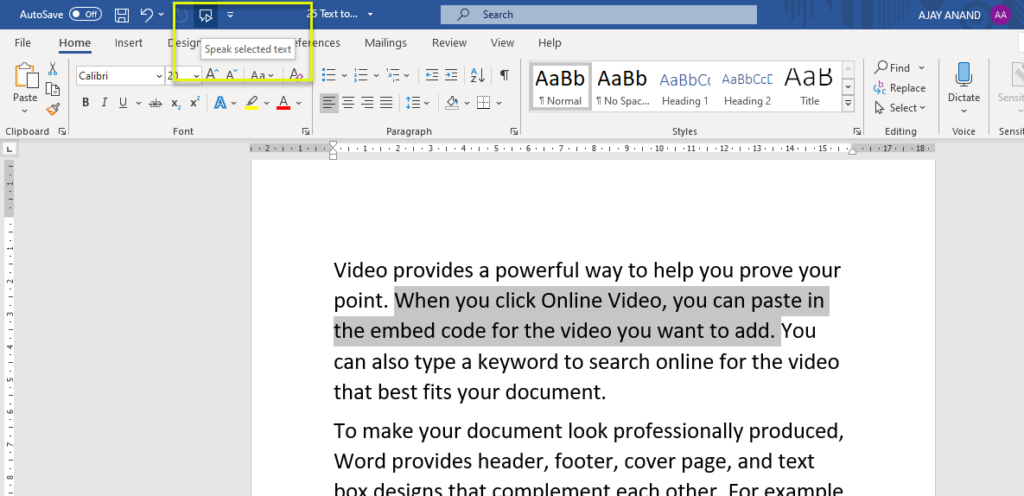
25. Text to Speech
The Speech to Text feature in Word can be used to play back the written text as spoken words.
To access this feature, Click on Customize Quick Access Toolbar > More commands…
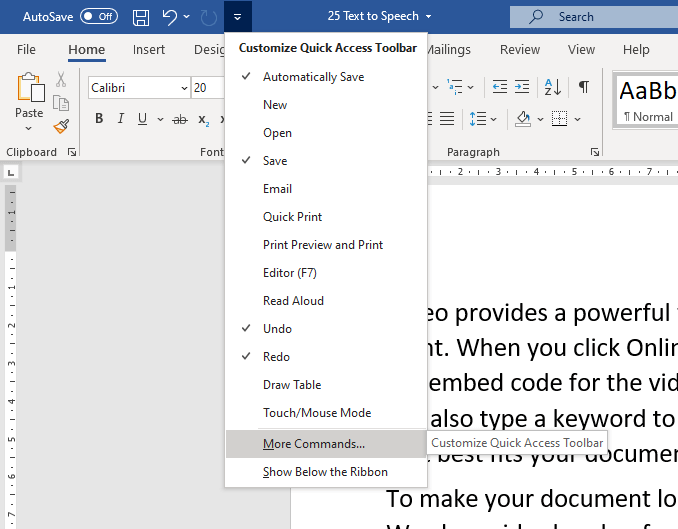
In the dialog for Word Options > Select All Commands > Select Speak from the list of commands > Add > OK
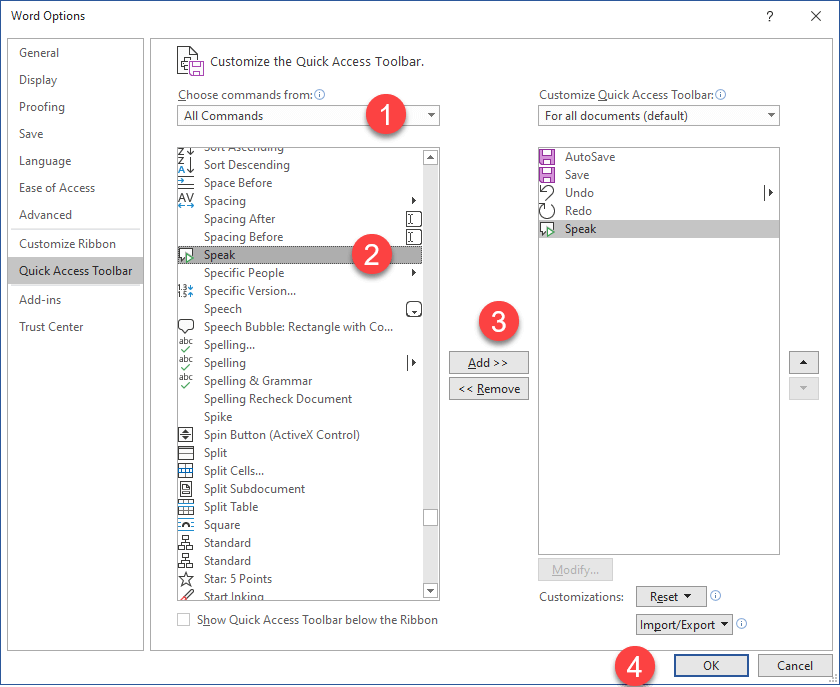
The option Speak Selected Text will be added to the Quick Access Toolbar. Select the sentence and click on Speak Selected Text for Word to start reading the text.
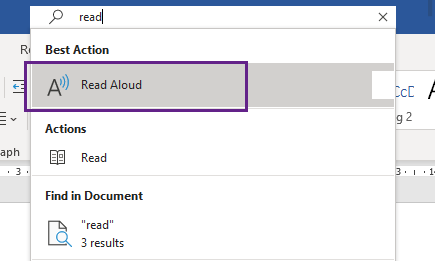
Read Aloud option in Word also can be used for the same result. Type in Read in the search bar and select Read Aloud from the suggestions to activate this option.