This blog post is about converting a Word file into a Password protected PDF file.
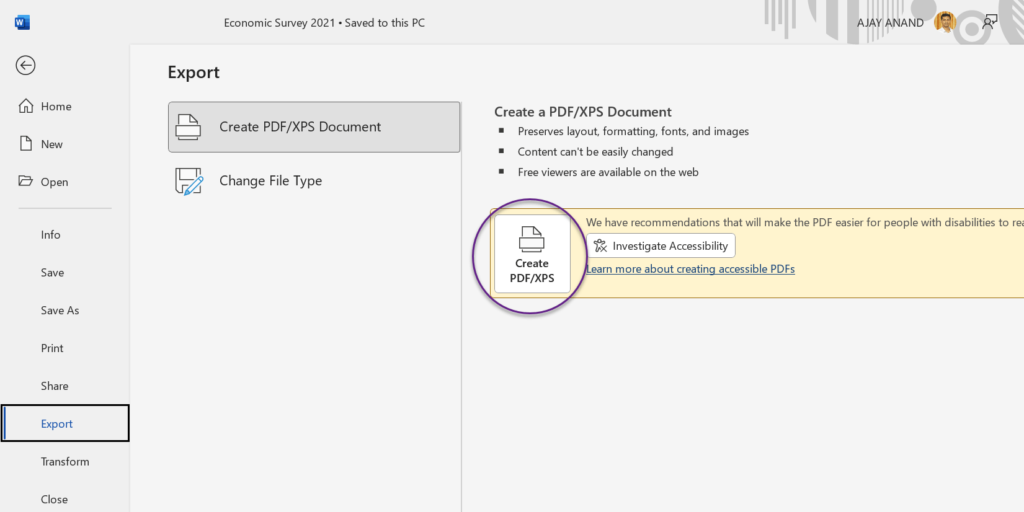
Go to the File tab in the Word Ribbon > Export > Click on Create PDF/XPS
The Publish as PDF or XPS dialog will be activated.
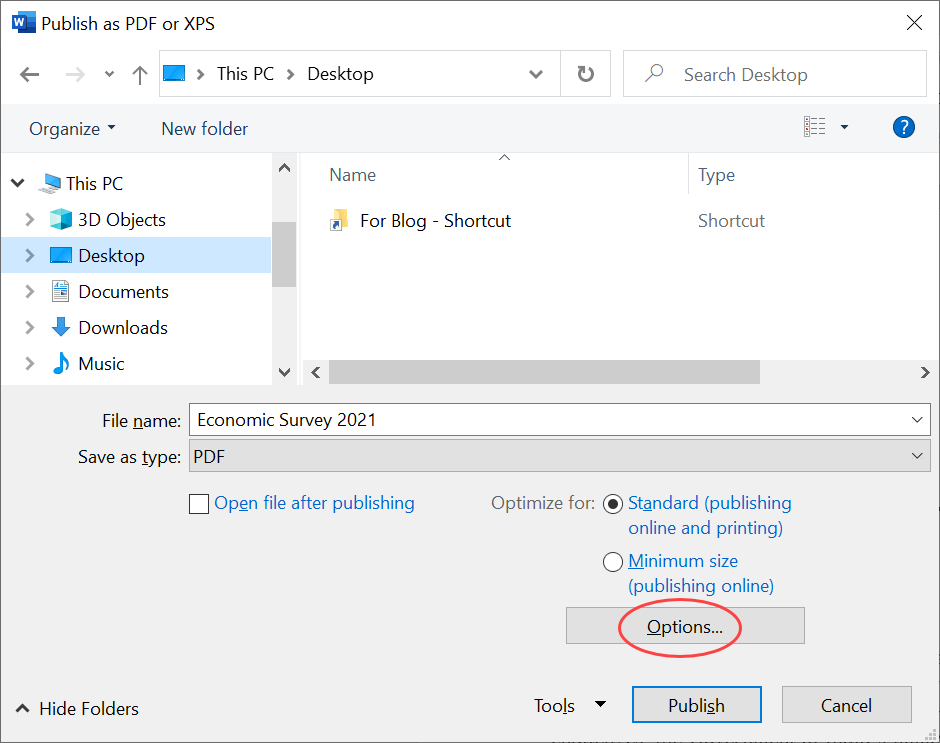
Click on the Options… button to activate the Options dialog.

Mark the checkbox against the label, Encrypt the document with a password.
Click on OK and another dialog called Encrypt PDF Document will be activated.
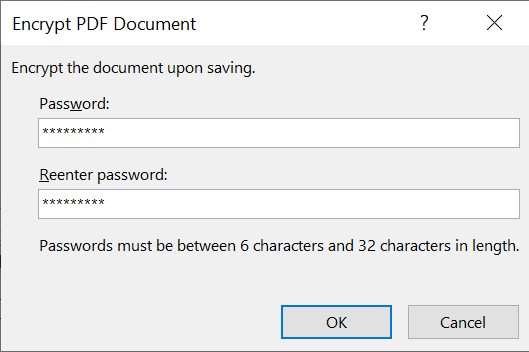
Type in the Password to protect the file. Reenter the password to confirm it.
Click on OK and we will be back to the dialog, Publish as PDF or XPS.

Click on Publish to export the document as a password protected PDF file.
When we try to open this password protected PDF file, we will be prompted to enter the Password.

Wrong passwords will be dealt with a Warning Message like the following.

Type in the correct password to open the PDF file.

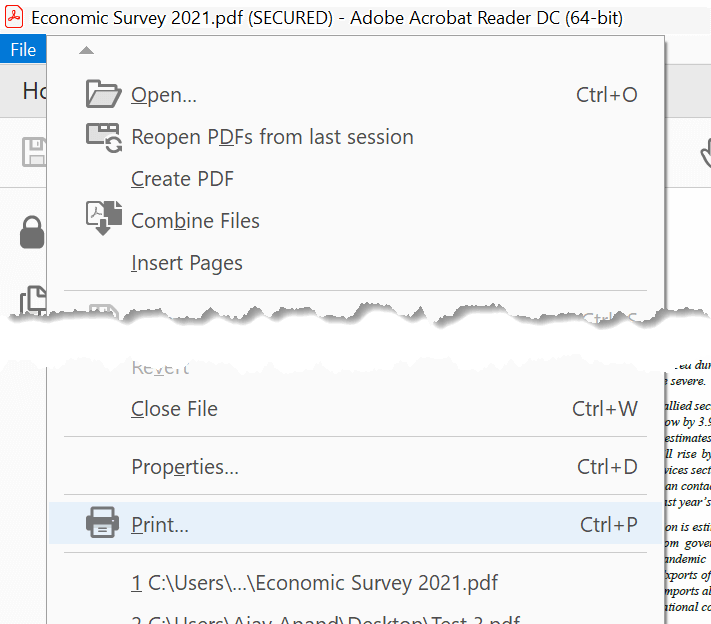
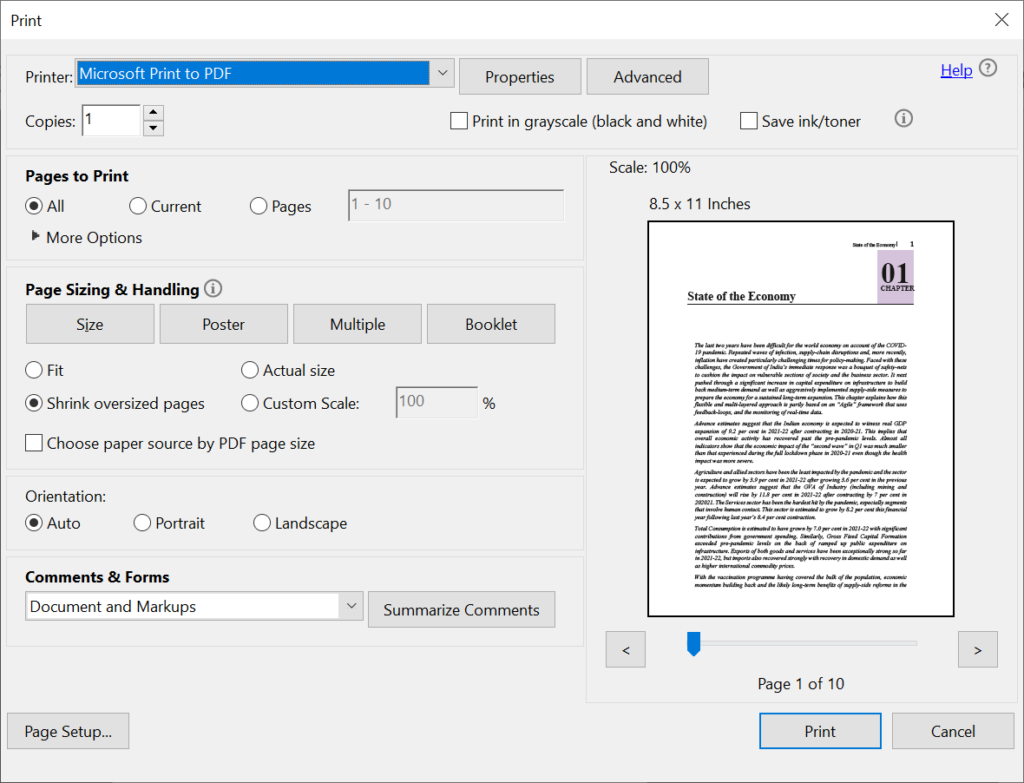
Now, if you want to remove the password from this file, print the file in PDF format.
Go to File > Print…
Click on the Print button in the Print dialog.
Use the Save Print Output As dialog to specify the ‘Name’ of the PDF file and the ‘Location’ where you want to save it.
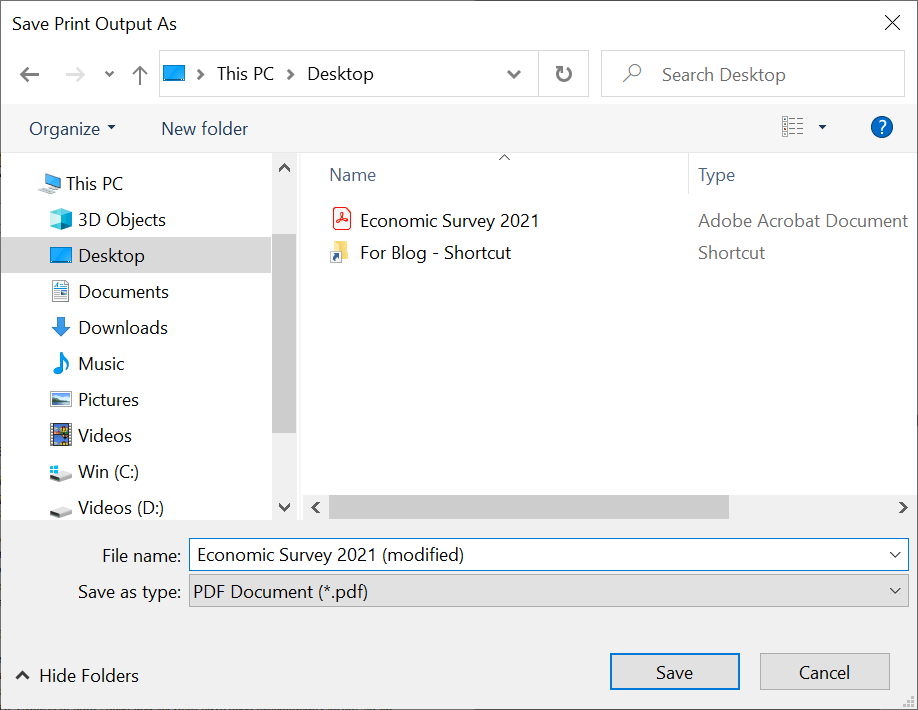
Click on Save and the PDF document will be saved as an unprotected file.