There are two types of Checkbox available in Excel. Both are located in the Developer tab of the Excel ribbon.
To insert a Check Box (Tick box) into an Excel sheet,
Go to Developer tab > Click on Insert button and you will get a menu like the following.
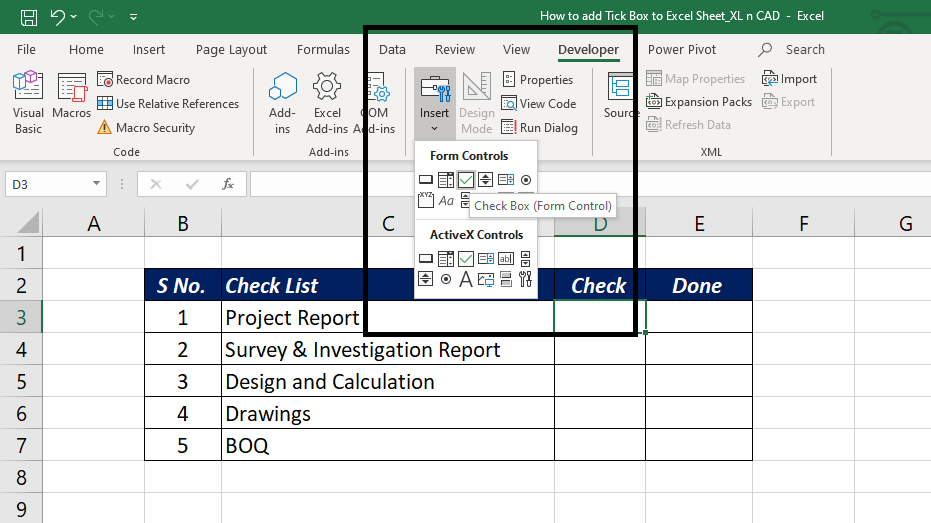
Checkboxes are available under Form Controls and ActiveX Controls. In this article, I will explain about CheckBox under Form Controls.
Click on the Check Box under Form Control and now, when you place the cursor on the worksheet, the pointer will have a + (plus) shape. Click anywhere on the worksheet to insert a Checkbox.
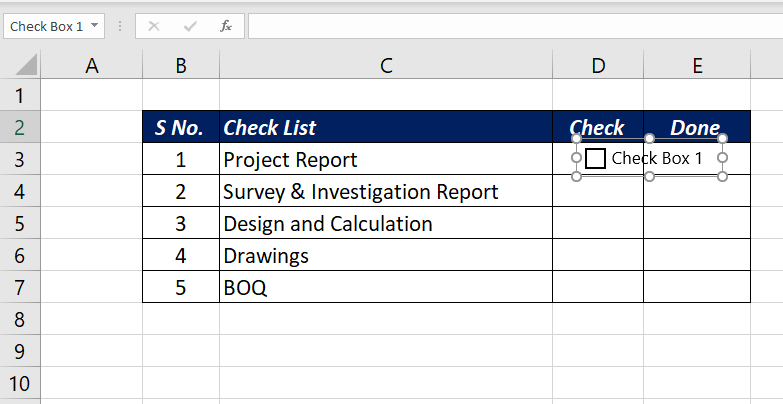
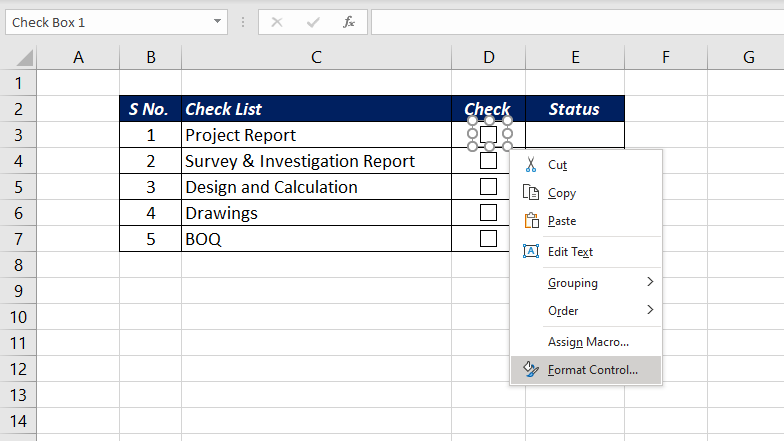
To modify the caption (text) of the Check Box, right-click on the box and select Edit Text
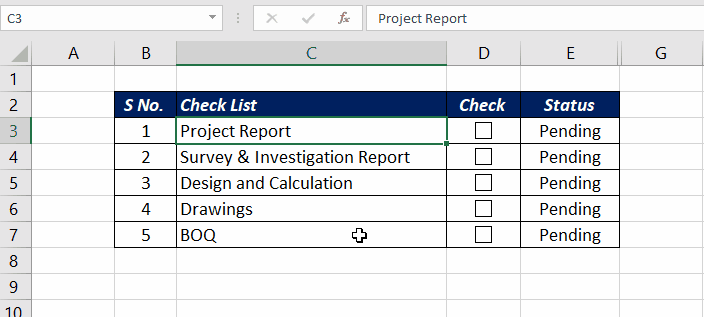
In this case, I will delete the text beside the Checkbox.
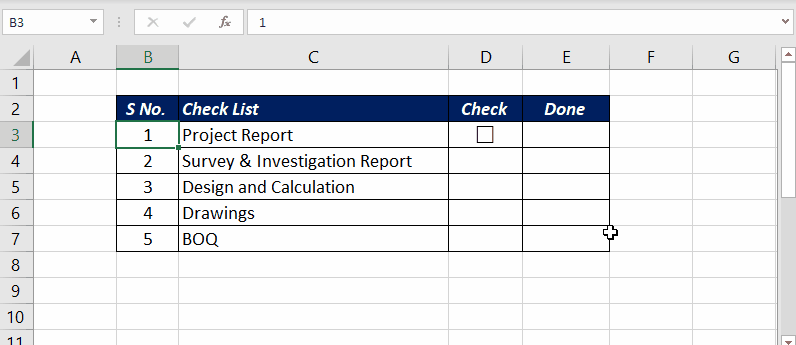
Now, we have a Check Box (Tick Box in the cell D3) and when I click on it a Tick mark appears inside the box.

To copy a checkbox from a cell into the adjacent cells below, use the Excel Fill handle.
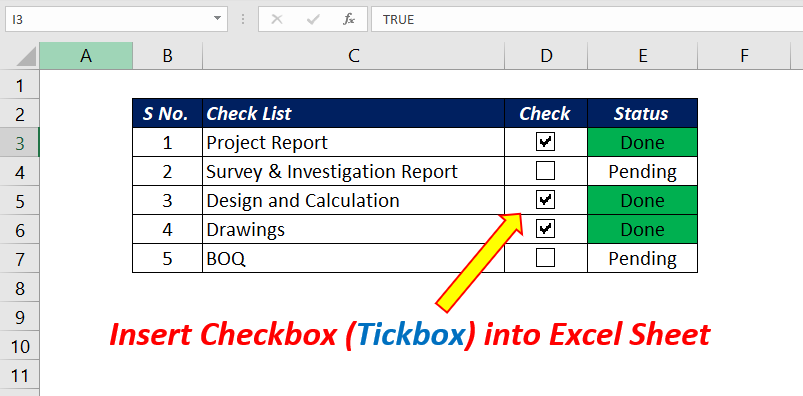
How to make use of Checkbox while creating a Checklist in Excel
Checkboxes that you saw above, can be linked to the cells of Excel worksheets. i.e. when we mark or unmark a Checkbox, the value in the linked cell update accordingly.
To link a checkbox to an Excel cell,
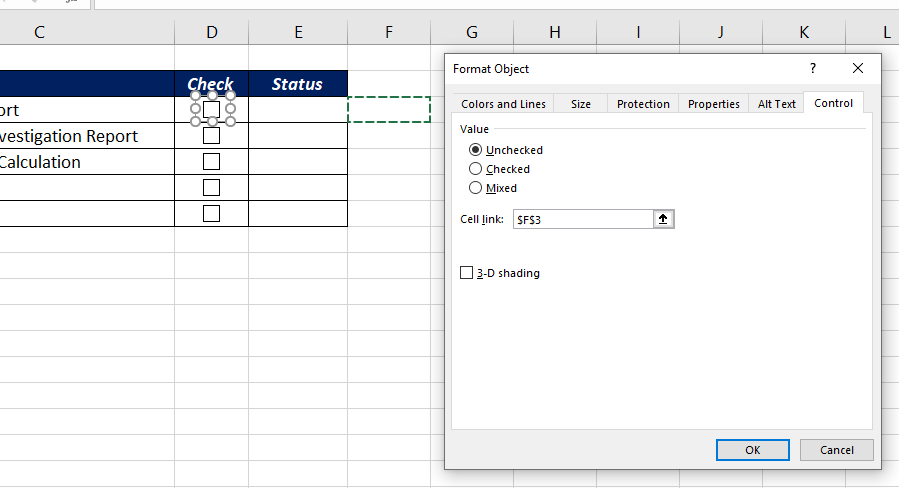
Right-click on the Checkbox > Select Format Control
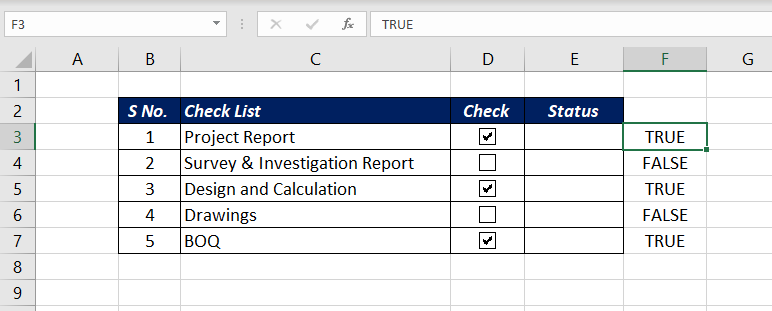
Select the tab for Control in the Format Object Dialog > Specify the cell to be linked in the input box for Cell link (in this case I will link the cell F3) > Click OK to confirm
Now when I mark the checkbox by clicking on it, the value in the cell F3 becomes TRUE. And when unmark it, the value in the cell F3 becomes FALSE
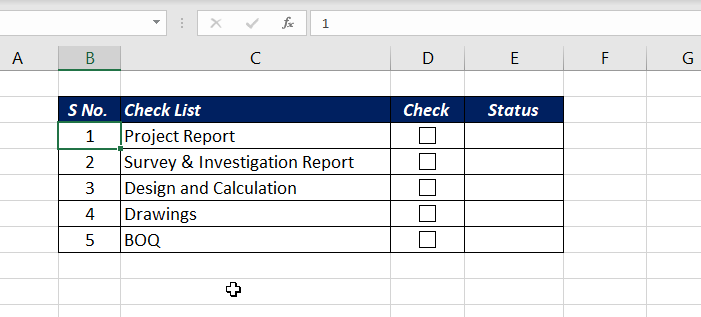
In the same manner, I have linked the other 4 checkboxes to the cells F4, F5, F6, and F7.
Now, I will make use of TRUE or FALSE values in column F for displaying the status of each task in the Checklist. For that, I will use the following formula in the cell E3 and will copy it down into adjacent cells below.
=IF(F3,"Done","Pending")
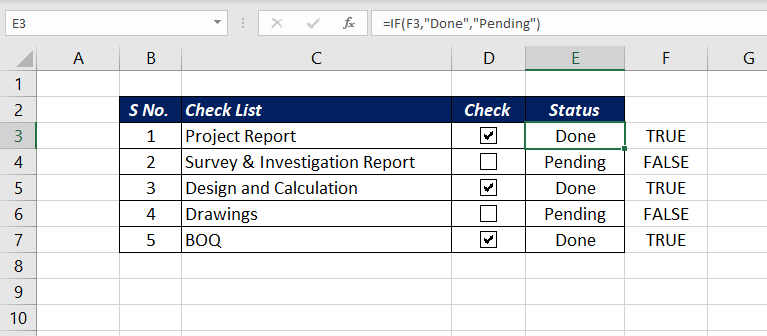
Now, when I mark or unmark the checkbox against a particular task the status updates accordingly.
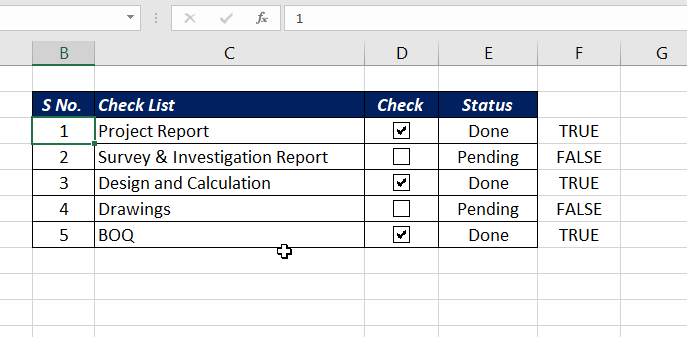
To spice up the checklist, I will use Conditional Formatting in the cells E3 to E7 using the following formula.
=E3="Done"

Now, when I mark each checkbox status updates to ‘Done’ and the background color of the cell changes to Green.
Watch video on How to Insert Checkbox in Excel [Create a CheckList in Excel]